Being able to cook is a great skill to have but being able to cook outdoors on a campfire is a different matter entirely. The truth is that there is not one way that is best for campfire cooking. It will depend on where you’re cooking, what you’re cooking and how many you’re cooking for.
That being said, there are a few fundamentals that I will share with you now and I also have a list below of different ways to cook your food on a campfire.
- Make sure you are allowed to start a campfire. It is prohibited to start any type of fire in some states and campgrounds. This may change depending on the time of year so contact your local forest ranger to find out more. Some campgrounds don’t even allow stoves.
- One thing people seem to confuse is that it is not the flames that cook the food but it is the heat from the fire. I don’t know how many guys I seen trying to cook food and it is nearly in the flames. It always results in burnt on the outside and raw in the middle.
- You have to raise the food away from the flames. The bigger the flames then the further you will have to move it.
- You can test it with you hand to get an idea of how hot the fire is. Be quick though, you don’t want to cook your hand.
- If the temperature is too high then the heat won’t have time to get to middle of the food before burning the outside. So slow cooking is the safest way to go.
- Before starting, decide what size of fire you are going to have and how you are going you hold the food.
Before starting your fire
I have already made a post on how to make a fire pit here. Check that out if you don’t know how to do it.
It’s important to decide which way you’re going to cook. It will be hard to manoeuvre hot rocks and you may have to do that if you don’t think ahead. Choose one of the methods below so you know what you have to do before you start.
Once you have to fire lit let the flames die down a little before starting to cook. You are going to be cooking on the hot coals, not the flames. If you dont know how to light a fire then check you my post here.
Don’t run out of firewood. Keep adding small amounts to keep the heat going.
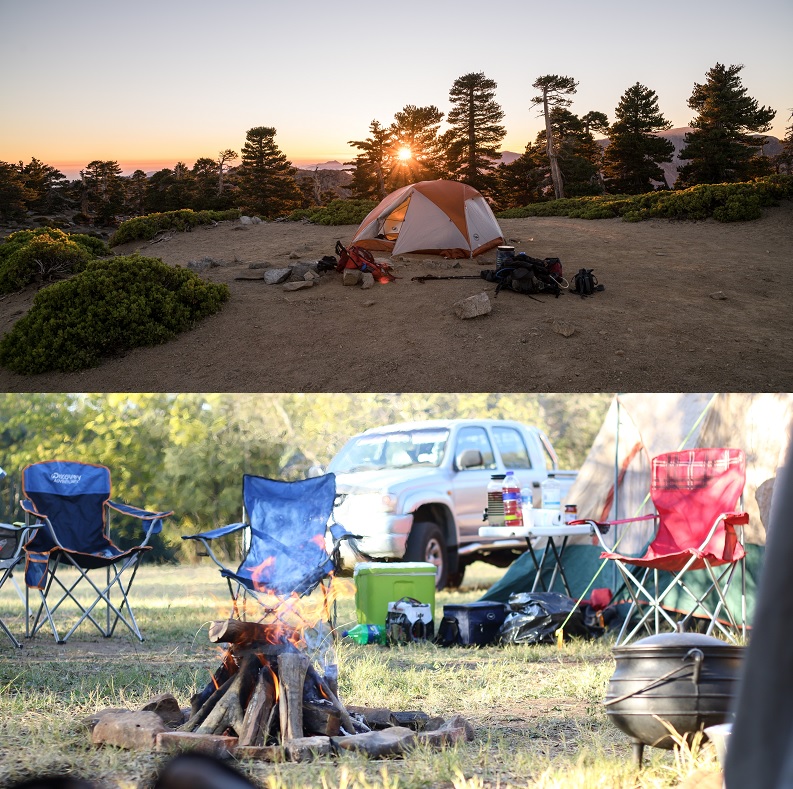
Bring the Right Equipment
If you are car camping or don’t intend on hiking far then why not take a few tools that will help you with your cooking.
- Grill
- Pot and/or Pan
- Tongs
- Skewers
- Plates/cups
- Sharp knife
The only item that you would struggle without is a good sharp knife and a pot or metal cup. You can get by pretty easily without everything else.
Types of food
When cooking fatty foods, the fat tends to drip into the fire. This can cause your fire to flame up and burn your food so keep an eye on it and move the food away is the flames get too hot.
If you’re carrying raw meat from home then be sure you keep it cold. Bacteria will grow on warm meat which can leave you sick. A cooler box is ideal for this. Here is the one I use plus two others.
The same rules apply to cooking in regards to hygiene. Don’t mix raw food with cooked and wash your hands after touching raw meat.
And don’t just think campfires are for meat. Campfire roasted vegetables are so nice and you have less risk or poisoning anyone.
Ways to cook on a campfire.
Stove
Ok, so this isn’t strictly cooking on a campfire but it is a viable way of cooking in the great outdoors. The advantages of stove cooking is that you don’t have to light an open fire, which is prohibited in some areas.
You also have great control of the flame temperature which makes it much easier to cook. They can be used the same way you use your home hob. This is the stove I use when I am car camping.
The downside to stove cooking is that you need to carry the stove with you. This is no problem if you are car camping but if you intend on hiking into backcountry then you will want to keep you weight to a minimum. You can get miniature stores that can be used to boil a cup of water but they aren’t ideal for cooking much food.
Most of the time you will be lighting a fire anyway for heat and for that cosy affect that only a campfire can bring. So why not learn to cook on it as well so that you don’t have to carry a stove around with you.
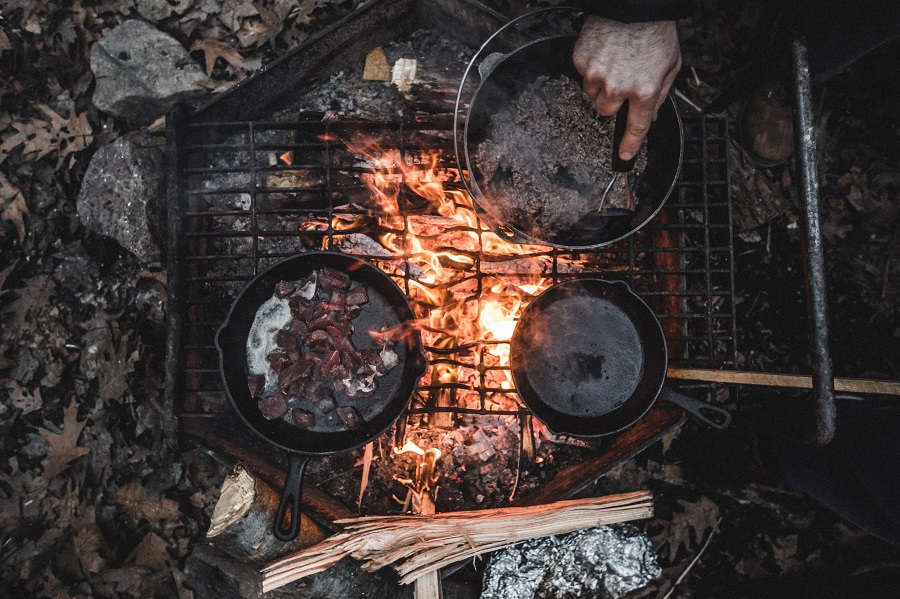
An old grill
Using an old grill over a fire is very similar to stove cooking only you are using the heat form the fire instead of your stove. Again, the only real downfall to this method is that you will have to carry the grill with you. It isn’t as bad as carrying a whole stove but it still puts some people off. There are some alternative to this which I will discuss below.
- First you will have to obtain a grill. Shelves from old ovens and oven grills are ideal. You could even use the grill from your camping stove if you didn’t want to carry the whole thing. I have even seen people use metal teapot stands or wire mesh.
- Before you light the fire you will have to set a way to hold the grill over the fire. Two rocks with flat tops either side of the fire is ideal for this. Have the flat of the rocks the same height so that the grill will sit level across them.
- Build the rest of the fire pit and make sure all the rocks a secure so that they won’t move during cooking.
- The size of the fire will depend on the size of the grill.
- Pro tip; If you can find four fist sized rocks they can be used to adjust the height of the grill if the fire is too hot. Lift up one side of the grill and put in two of the rocks at the two raised corners of the grill, then lift the other side and do the same.
- I like to have to fire lit at least an hour before I start cooking. This gives time for the rocks around the firepit to warm up which will give you a more steady heat supply.
- So now your ready to start cooking. Place to food on the grill and watch that it doesn’t start cooking too fast. If you think the heat is to high and you have no way of adjusting the height then you can either move the grill to the side of the fire until the heat dies down or you can turn the food frequently.
- When you think the food is cooked take the biggest piece and slice it in half to check that it is cooked through to the center or to your liking.
- Serve and enjoy.
Tent pegs
If you are stuck without a grill then you can use metal tent pegs.
- Just line then up side by side across the two rocks leaving a gap between them.
- Placing two more rocks on top on either end of the pegs will help stop them move around when you are turning your food.
Wooden grill
You can even use wooden sticks as your grill. Dried wood won’t work as it will catch fire more easily.
- Cut sticks that are about the diameter of your finger for a living tree. They don’t have to be too long. Just enough to sit on the to rocks in your firepit.
- Line them up so they side by side with a gap between them.
- If your heat is too heat it will burn them so wait until the flames dies down. Anyway, If it is that hot it would have burnt your food.
- Again, you can hold down the the ends down with rocks to help stop it moving.
- Use new sticks every time.
Metal Pot
Cooking with a pot (or metal cup) is very easy and is my prefered way of cooking when camping. The main reason for this is you can carry light dried food that is great when boiled. You can boil anything really and it doesn’t take as much looking after when your food is cooking. It’s very hard to burn your food when boiling it. You could even throw in a few vegetables and you would have a stew.
You could also use it to fry your food. It will be protected from the flame but you do need a few utensils for this and the temperature is hard to control so I don’t often use this method.
- When making your firepit you will want a rock that will protrude from the firepit wall into the fire slightly. The part of the rock the protrudes into your fire should have a flat area where you can place your pot. You can then control the temperature of your pot by sliding it to and from the center of the fire.
- You can simply place the pot on the flames if you need to but this isn’t good practice. Not only does your pot get extra dirty but as the sticks underneath burn the pot can move which could lead the pot tipping over. This can not only result in you losing your food into the fire but you could also end up putting the fire out.
- I like to have the the fire lit at least an hour before I start cooking. This give enough time for the center stone to get hot.
- Place your pot of water onto the stone and allow it to boil. Don’t worry if the flames are touching pot. As long as it’s metal then it won’t harm it.
- Slide your pot back from the center of the fire. Be careful, its hot. Use a stick or utensil if you have it.
- Place your food into the boiling water and then slide the pot back into the center of the fire to bring it back to a boil.
- Once boiling is achieved slide it back again slightly. Just enough so that the water is now simmering.
- The size of your food will depend on how long it takes to cook. I suggest cutting everything small and don’t overfill the pot.
- Meat tends to toughen at first when boiled but if you leave it simmering for a lot longer than it needs then it will begin to become more tender.
- Alway cut open your food before eating to ensure it is cooked through.
Cooking with nothing
What happens if you don’t have any equipment with you? First you will have to start a fire without matches, then you will have to know how to cook without having any equipment. The following two methods are ways that you can cook without any equipment.
Hot rock
This might sound a bit far fetched but this actually worked really well for me when I tried it.
- Set the fire up just like you would if you were setting a grill fire. Two large flat stones at either side of the fire pit.
- However, instead of using a grill you are going to have to find a smooth flat thin rock. These can be found near riverbeds. Don’t take stones from the river itself. Water can get trapped into rocks. When you heat the rock the water can expand which can cause the rock to explode. Look for rocks higher up on the riverbank. They will be less likely to have water trapped in them.
- Place the rock over the fire and wait. The time it takes for the stone to get hot will depend on the size of the fire and the thickness of the stone. A thinner stone will take less time but will cool quicker.
- Once the stone is hot to touch then it’s time to start cooking. The stone will remain hot for a long time but keep the fire going.
- Cut your food into thin strips and turn often. This will help the heat to transfer to the middle of your food. The thinner you cut the food then the faster it will cook.
Spear cooking
This is probably the most primitive method of the lot but it’s also so practical and the easiest the control. The only downside I can see with this method is that you need your campfire on soft ground.
- First light your campfire as normal. No special requirements for cooking.
- Cut your meat in fist sized chunks or smaller.
- You then have to prepare you cooking spears. Use long thin branches. Use your knife to sharpen each end of the branch to a point.
- Now skewer your meat into the branch. You don’t have to push it on too far. Just enough so that it won’t fall off.
- Now you can either hold the stick over the fire or stick it into the ground and angle the food so that it is over the fire.
- Don’t have it too close to the flames. The heat above the fire will be enough to cook your food.
- Use more spears so that you can cook more food at the same time
- Alway check that your food is cooked through before eating.
The idea above are just to get you thinking really. You could mix and match, depending on your circumstance. For example, I often use my pot on top of a grill.
Don’t be afraid to experiments. It will take a few tries before you find a way that works best for you.
If you have found this article helpful then please remember to share by clicking on one of the buttons below. It will help others find this article too.
Links from the above post;