Every camp or hike will require you taking your own water but if you’re away for any more than a day then you will have to find a way to top up your reserves. Most of the the time you can just pop over to the nearest store to buy a few extra bottles of water. However, this won’t be viable if are camping in backcountry when a trip to the store is off the cards.
It can be tempting to take and drink water from a nearby water source but you should always purify it to make sure it’s clean enough to drink. This leads me to answer one of the first questions I get asked when I talk about purifying water.
Why treat water?
Even if water looks clean it can still contain microscopic pathogens such as bacteria, parasites, algae and/or viruses. Drinking water that contains any of the above can leave you feeling very sick, very quickly.
Water can look perfectly clean but still contain the above elements so there is no way of knowing the water is pure unless you treat it.
Diarrhea is the most common symptom of drinking impure water. This should be treated as soon as possible because if diarrhea is severe you could dehydrate and can be fatal. Diarrhea tablets can be taken but sometimes this can be a bad idea as you’re stopping the pathogen from leaving your body. If diarrhea doesn’t subside quickly then seek medical help before your get too weak.
How to purify water?
There are many ways to purify water but I’m only going to focus on methods that you can use while camping.
Filtration
Water filters are probably the easiest way to drink water when you’re out in the wild. Filters, such as LifeStraw (Amazon link), allow you to drink water straight from the source. You can even get these same filters built into a water bottles so just scoop up some water and away you go.
It works by passing water through a mesh filter. The pores in the filter are smaller than the bacteria, parasite, etc so they get trapped in the filter while still allowing the water through. It’s important to get a reputable brand as some filters pores are too big to trap everything. Once your done drinking don’t forget to blow through the straw to remove debris and any pathogens that may to been trapped in the filter.
If you are stuck without a filter then filtering water through cotton clothing will be better than nothing. Not only will it clean the debris from the water but it will reduce the likelihood of you drinking something you shouldn’t.
- If you have an empty plastic soda bottle then cut the bottom off.
- Turn it upside down and stuff it tight with your cotton clothing.
- Pure some water on top of the clothes and wait for it to seep through. The slower the water exits the bottle, the more filtered it will be.
I recommend always carrying a lifestraw, even if you don’t intend on using it. They are light and are relatively inexpensive. You never know when you might need one.
Boiling
The next best thing for purifying your water is to boil it. Bacteria, parasite, etc. are living organisms. When you boil the water it kills them leaving them harmless, however, they will still be in the water.
If I am boiling water I first filter it through a cloth, like above, before I boil it. Although, this is more to remove debris from the water than to try to remove the bacteria, etc.
- Place a pot of water over a fire.
- Once the water starts to bubble violently, you know it to boiling. Continue boiling for at least one minute (5 minutes at high altitude because water boils at a lower temperature).
- Once it has cooled it will be good to drink.
Evaporation
This is a little trickier to set up but is a great way for purifying water or even create drinking water from plants. It’s so effective this you can actually use it to make seawater drinkable.
As water evaporates, tiny particles of water rise into the air leaving everything else behind. The trick is to catch this water. All you need is some clear plastic, a mug/pot and sun.
- If you have a large bowl then put possible contaminated water into it.
- Place the mug in the center of the bowl.
- Now cover the top of the bowl with the clear plastic making sure the is sealed so no air can escape. If air escapes then so can the water vapour. Cling film on a bowl is ideal.
- Now place a weight in the center of the plastic, over the mug. This can be anything, such as a stone. This weight will make the center of the plastic sheet lower than the rest. As the water collected on the inside on the plastic, due to evaporation, it will roll to the lowest point and then drop off into the waiting mug.
- Now wait. Try to have it in direct sunlightas the heat will increase the evaporation rate.
This process can be quite slow but if you have no other way then it could save your life. It is possible to collect 1 – 2 quarts of water per day for every square meter. This won’t be enough to sustain a grown adult for long so use as much surface area as possible to try to speed up the process or make more solar stills if you can.
If you are finding it hard to find water then you can abstract water from plants by using this evaporation method.
- Try to find a hole that has green plants or grass growing in it.
- Now, same as above, put your mug, pot or whatever you have to collect the drinking water into the center of the hole.
- Cover the hole with clear plastic and place a weight on the center of it, over the pot.
The plants give off water by a process called transpiration. Water evaporated off the foliage and collects of the plastic above. It then drops into the pot below.
You could also dig a hole. There could be damp dirt underground. This moisture will evaporate and collect like above. You could add to the moisture by throwing in some green plants and/or dirty water. I have even heard of people who have urinated into the hole to add more moisture. Try everything at your disposal if you’re in need of water.
Chemically
There are many chemicals that you can use to purify water. However, I’m only going to mention the ones that you might have with you and ones that you might want to take with you, just in case.
Before I go on, I don’t recommend using chemicals as they can be harmful to you if used wrong. Remember, these chemicals are poisoning the bacteria, etc so if you get the dosage wrong then you could end up poisoning yourself.
This is not a method you should plan on using but rather something to use in case of emergency. People with thyroid issues or pregnant people should make an extra effort not to use chemicals in their water.
Bleach
Most people are surprised to hear that normal household bleach can be used to purify water. It is poisonous, right? It is but if the dosage is right then it will kill any photogens in the water without you even tasting it.
- Use unscented bleach, as the scented types will leave an unwanted taste.
- The correct dosage is 2 drops for every quart/liter of clear water. If the water is still cloudy after filtering through a cloth then use 4 drops to be sure it is purified.
- Once you add the bleach give it a good stir and leave it for 30 minutes to give it time to kill any pathogens that might be in the water.
- The water will now be drinkable.
Potassium Permanganate
This has many survival uses such as starting fires and treating open wounds but it can also be used to purify water.
Again, it is important to know how to use it as a high dose can be fatal. Potassium permanganate usually comes in a dry crystal form.
- Add 3 – 4 crystals per every quart/liter of water.
- Give it a stir and leave it sit for an hour.
- The water should turn a pale pink color. If it is dark pink or purple then it is too strong so dont drink it.
- Try to add more water to dilute the potassium permanganate but remember you will have to wait another hour if you have to do that.
Iodine
Another item you might have in you backpack is iodine. This is used for treating cuts and disinfecting but can also be used to purify water. The early versions of a lifestraw used to have iodine in them.
You will probably have a small bottle in your medical kit. This is known more specifically as povidone iodine.
- Mix 7 or 8 drops of 10% povidone iodine for every quart/liter.
- Wait for 20 minutes and it should be good to drink.
Collecting water
You can greatly reduce the chances of collecting water with bacteria or anything else in it in the first place by knowing where to look. In some cases, it is possible to drink water without treatment, but this is not advised and should only be done if you have no other option.
First let’s look at what you should not do. Never drink from standing water. Water that isn’t flowing, such as swamp water, is a breeding ground for bacteria. In some places you can actually get a smell from the water.
Flood water should always be avoided. Not only is there a possibility of bacteria, parasites and algae but it could also contain chemicals that were used on the land by farmers and is now mixed into the water.
Ponds and lakes aren’t much better but because they have more water the amount of bacteria, etc. is diluted.
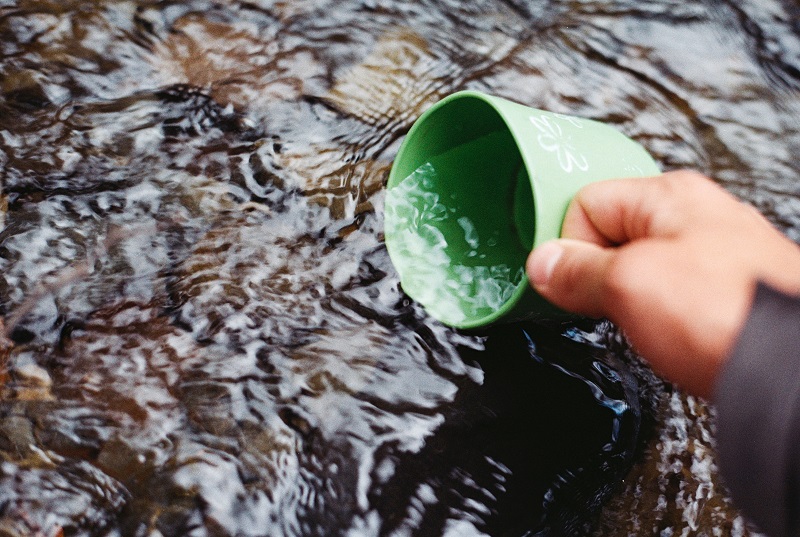
Rivers are my prefered source for water. A fast flowing small river is ideal. The faster the flow the better. Bigger rivers have a higher chance of carrying pollutants from upstream.
I have drank water directly from a fast flowing river before with no problems but it is risky. You don’t know what is up river. There could be a dead animal upstream which will obviously taint the water.
Collect rainwater
Rainwater is pure and ready to drink, you just need find a way to collect it. Instead of just leaving your pots and pans out, which will take a day of heavy rain to fill, you should try to find a way to expand the surface area. The bigger the area, the more water you will collect. It’s that simple.
Plastic sheets or waterproof tarps are ideal. There are two ways for using this method.
One is to make a wooden frame out of branches. It’s essentially four vertical legs joined together with four more branches. You will be left with something that looks like a table, without a flat surface.
Make sure it’s smaller than your tarp. Wrap the tarp around the horizontal branches allowing the center of the tarp to sag down and touch the ground. You’re trying to create a pocket for the water to collect.
The frame will need to be strong and the tarp tied tight. Water is heavy so the more you collect, the more pressure the frame will encounter. That is why I suggest letting your tarp sag onto the ground. It will take some of the weight.
After it rains and you have collected water, cover it with another tarp or whatever you have. It will stop your water getting contaminated. If you have water bottles then fill them all up or if you have a large water storage tank you can modify the frame so that the water flows off the tarp and into the tank.
Instead of having all four legs the same height you will need two of the legs on one side to be half the length. Again, join them with branches so this time you are left with a lopsided table.
Attach the tarp but this time tie it to the high side and the two diagonal sides. Let the tarp sag under the low branch. This should be the lowest point of the tarp so water will run down the trap and into your water tank.
If you’re in a heavily wooded area then you could just use tree branches instead of making a frame but make sure the canopy of the trees aren’t too thick or the rain won’t get to you. It is better to build the frame and put it out in the open.
This method requires a great deal of skill to get right so that is why I have added method two.
To collect water just find or dig a hollow in the ground. It doesn’t have to be deep but the wider the better. Remember, the more area there is then the more water you can collect.
Now simply roll the tarp over the hollow. The rainwater will keep the tarp pushed down into the hollow and the water will pool. The only thing I don’t like about this method is that the water is on the ground and is open to contamination from wildlife. If you do use this method then don’t use it for storing water. Fill up your bottles and whatever else you have to keep it clean.
Like I said at the start of this post, there are many more ways to purify water but they dont apply to us campers. I have also seen other ways to collect water on the internet but they all seem like things that you just wouldn’t do, such as collecting morning dew from grass and spiderwebs. I wanted to give you practical advice on things that actually work.
Store your gear
Before and after every camping trip make sure you clean your water bottles and bladders. Bacteria can grow in bottles and bladders as you store them. Rather than having to scrub your stuff before you use them it is better to clean and dry them as soon as you get home. Use a mild bleach or milton to make sure it is clean. Don’t forget the lids and mouth pieces and these can be a breathing ground for bacteria.
If you have found this article helpful then please remember to share by clicking on one of the buttons below. It will help others find this article too.
Links from the post above;
One Reply to “How To Purify Water In The Wild. Methods For Camping Only!”
Comments are closed.